Tuesday, 31 May 2011

Bondo Mud!

I've seen this technique used before on other forums so I thought id give it a go.
You mix car body filler (bondo) with polyester resin. Most bondo is made using polyester resin so they're compatible, but always check yours first. Once mixed you use the normal red catalyst paste you get with the bondo. The mixture is like mud, and easier to spread than bondo alone although it is more tacky of the surface.

Jonathan

Saturday, 28 May 2011

First filler down

First layer of bondo is on and lightly sanded. Starting to look nice and rounder.

Jonathan

Friday, 27 May 2011

Reenforcement done

So I went ahead and started applying the Polyurethane reenforcement and found two layers are more than enough. Each layer was 200ml when mixed so it's combined to 400ml. Starting to feel like a real shield now.
Hopefully I'll get some time to work on it tomorrow.

Jonathan

From Jonathan's Projects

I had a bit of time yesterday so I decided to apply some Polyester resin to the outside of the shield. This is to serve two purposes,
1 - To help stiffen it before applying the Polyurethane to the inside to help stop warping.
2 - To help fill any small holes there could be around the joints.

I plan on applying the Polyurethane on the inside tonight, probably looking at about 3 coats minimum, but we'll see how we go.


Jonathan

Wednesday, 25 May 2011

New Project

From Jonathan's Projects

So the Iron Man armor has been a no go since the last post. I haven't had the drive to continue it.

But last weekend I started a new project, the Hylian Shield from The Legend of Zelda: Twilight Princess. I came across the Pepakura for it more than a year a go but never made a start till now. The Pep comes in two parts, the main body of the shield and the detail which is then attached to the top.
I've completed assembling the Pep, but I've not attached the detailing yet. I plan on waiting until the shield face has been filled and rounded until I add the detail otherwise it will just get lost under the filler used to round the face.

I've also added a brace to the back to keep it rigid until the fiberglassing has been done. I hope to start the fiberglassing this weekend.

I downloaded the Pepakura file from the Section Sixteen forum. The links below, however you need to be registered to download the attachments. As they're not my files I'm not going to link to them directly, you will have to register to get them.
http://sectionsixteen.freeforums.org

Jonathan

Saturday, 3 July 2010


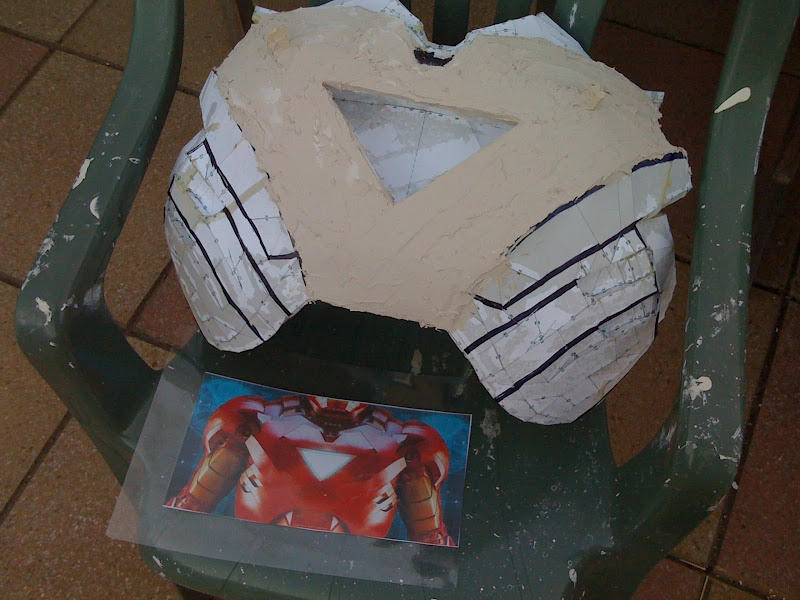
I had some time after work today so I spent a couple of hours adding a little more reenforcement to the chest and then started on the car body filler work.

I made some outlines in marker to help seperate the areas so I can focus on one area at a time.

Jonathan

Sunday, 27 June 2010

Back complete and chest re-enforced


I've now finished the back and managed to re-enforce the chest today.
I first glued a wire hanger into the chest so it would keep it's shape. This worked out really well.

Next step I'm taking is adding the detail to the chest using car body filler.
Hopefully get some done during the week.

Thursday, 24 June 2010

Chest done onto back.

Okay, so I've finished the chest and at first I thought I'd need to rescale it as it didn't seem to sit right. But after referencing some images of the Mark VI I found I was just holding it too low, once in the correct place it looked good.

So I've not moved onto the back and done a fair bit, starting from the spine, moving downwards then upwards. I'm about 40% there and hopefully I can finish it before the weekend.
Pictures to follow.

Jonathan

Tuesday, 15 June 2010

Mark VI has begun!


I've been waiting for a Iron Man VI Pep to come onto the scene since watching the first Iron Man 2 trailer and finally one has arrived.

robo3687 on the siwdat.com forums has provided a well detailed set of Iron Man armors which cover the Iron Man 2 movie suites. These can be found here

So I'm almost done with the Pep work, although I spent a couple of hours prior to Pepping sorting out supports so it would keep its shape during the re-enforcement stage. The total Pep time is going to come to 7 hours and hopefully I can re-enforce it this weekend.

Monday, 14 June 2010

Well I missed a few blog posts :S Sorry!


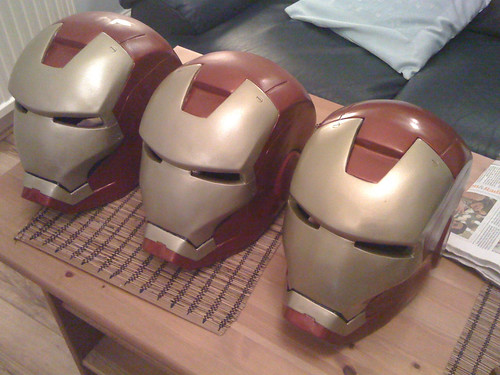
Well I did eventually finish off the mold and have successfully cast a few helmets. Can you spot the difference?
Next step on the helmet front is to make a nice copy for myself and install a set of light up eyes like I did for the master and an electronic system for the faceplate.

If you've not seen the light up eyes yet then check my Flickr photo stream here

I've started moving away from Flickr, and towards Picasa so I'm removing the Flickr gadget on the right because it seems to make the page take ages to load.