Sunday 24 March 2013

It's coming together

This weekend I reattached the body to the stock and grip. I did this by cutting rectangle pieces of MDF and slots into the two parts. I then super glued these rectangles to attach all the parts.
I then went onto bevel the top edge to a point. And finally I used some black Milliput (epoxy putty brand) to give a nicer edge to the clip socket.


Jon

Sunday 17 March 2013

Hellfire body progress

This weekend I made a decent amount of progress on the side panels of the main body. Building up the panels with body filler alone was taking too long so I decided to use a different technique I've seen used by other prop makers like Punished Props and Volpin Props. They've used insulation foam to build up the prop and then laminated resin or filler over the top. Luckily I had some left over foam from when I insulated my shed which was perfect.
So I started the same, building up fences and then gluing blocks of foam to the panel and fences. This was then filed and sanded down to under the required shape. I also cut the panels in half so I could easily shape the bevels.
I then put a layer of filler down and did an initial sanding pass.
Finally I glued the panel pieces onto the inner frame. During this I accidentally snapped a thin section which is why there's a stop and clamp in one of the pictures.


Jon

Saturday 16 March 2013

Hellfire Circuitry

Didn't get anything done last weekend unfortunately, too busy with errands.
But today I found the time to work more on the circuitry. I've added a switch and LED and worked the code to mimic what happens in game. Results can be seen above. I still need to add more LEDs for the other light up panels etc.


Jon

Sunday 3 March 2013

Experimentation with stepper motors

I had a pair of stepper motors arrive on Friday so I spent the evening hooking them up to an Arduino Nano. Turns out they don't spin fast enough as they're geared down. I tried opening one up to remove the gearing but the motor proved to be too underpowered. So I've now go to find a motor small enough to fit, but with enough power to spin the clip.

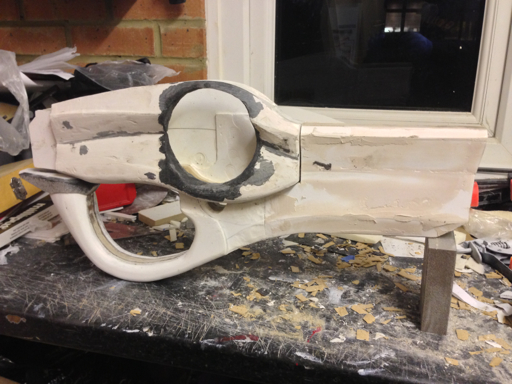
Over the weekend I switched my attention back to the SMG. I thickened the centre layers and cut out a section to store the electronics. I also cut out a piece from the front where I'll be mounting the muzzle and other details. I then started the outer layers, creating fences and using body filler to build up to the fences.

Check out my gallery to see images of the gun and electronics build.


Jon